If you’re wondering what welding tools for beginners you need, I’m going to reveal that and much more in this article.
Many beginners who want to learn welding get caught up thinking that there are tons of welding tools they need and that they have to pay a lot for them.
That’s a myth that I’m about to bust in this welding tools checklist.
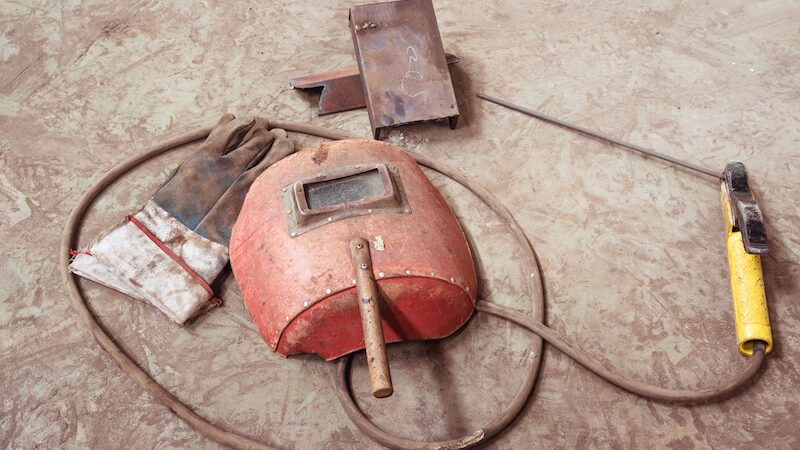
With that said, here are the 16 basic welding tools for beginners.
1. Auto-Darkening Welding Helmet
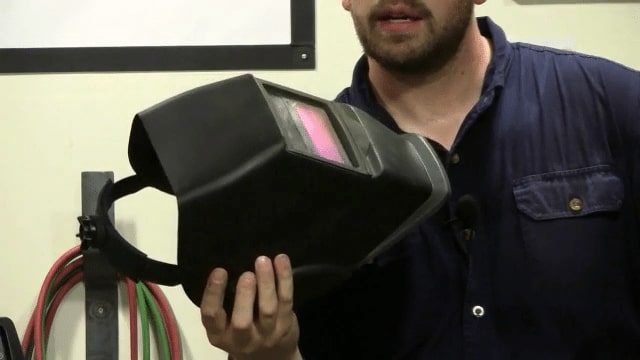
This first basic welding tool is a must-have for anyone welding. It’s a welding helmet.
Not all welding helmets are created equal, but you don’t have to spend $350 to get a good one.
The first piece of advice I would give you here is to choose an auto-darkening welding helmet.
A welding helmet is the most important welding workshop tool you have, so you want something that’s user-friendly.
Your other option is to buy a welding helmet that has a solid shade, but here’s the problem with that. You can’t see your workpiece through the lens, and it could cause your welds to be placed improperly.
Auto-darkening welding helmets are great welding tools for beginners because they allow you to easily see the workpiece before starting your welds, which means more accuracy and less frustration.
2. Welding Magnets
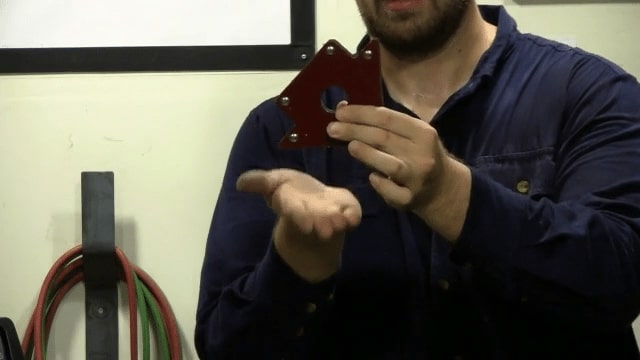
Welding magnets are an essential welding fabrication tool because they are so versatile.
You can easily hold pieces in place, and create 90 degree angles with any of your projects. I love to use them when I’m building welding frames for tables, fire pit grates, and more.
They come in several different sizes for small welding projects all the way up to large projects. But make sure you buy multiple magnets.
If you’re making a square frame, you’ll want to have 1 magnet on each corner of the work piece holding it in place.
Harbor Freight Tools is a great place to get welding magnets or any kind of welding tools for cheap.
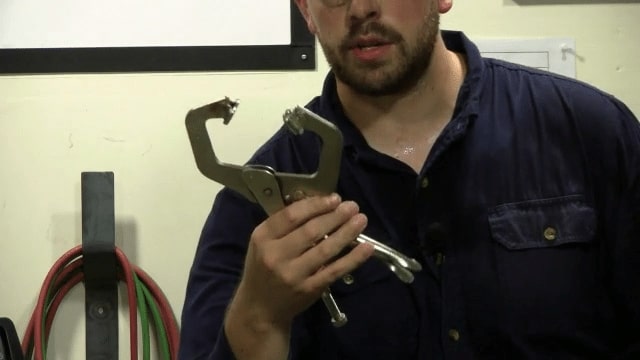
3. Welding Framing Jig
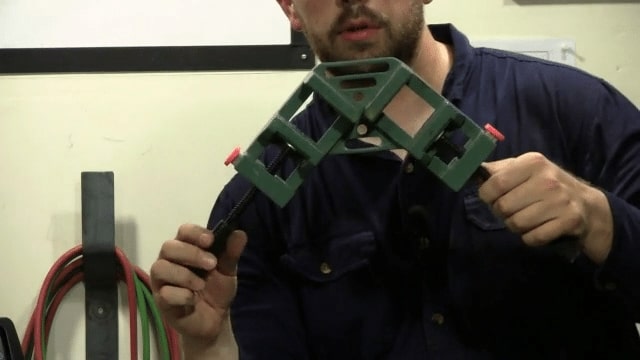
A welding framing jig is NOT a required welding tool for beginners, but I put it in here because it’s so effective at helping you create frames that are square.
Basically, you just put the 2 end pieces of your work piece into the framing jig, tighten it down, and make your tack welds.
Now you have a perfect 90 degree angle. Pretty simple, right?
However, if you get creative with some C clamps you can make one of these and save yourself some money. Just like any welding fabrication tool, the welding framing jig will save you lots of time and frustration, especially when you consider that steel tends to warp when welded.
[coursead]
4. Speed Square
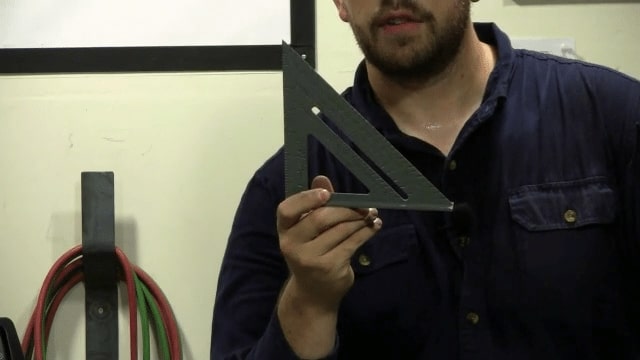
The speed square is a necessary tool, and here’s why…
Let’s say you’re working with a long piece of square tubing, and you just want to cut off about 12 inches of it.
You set your speed square on the work piece, make your mark across the tubing, and now you have a 90 degree cut ready to go.
Plus, if you want to make that cut a 45 degree angle across the steel tubing, you just slide your speed square across until it hits the 45 mark. It’s super easy to use, and a welding tool you can’t do without.
I’ve used mine on numerous welding projects.
5. Sheet Metal Gauge
This next tool is great if you want to find out how thick your metal is.
This is great because most welders will have a chart that says what setting you need to weld on for different metal thicknesses. It’s hard to eyeball the thickness of a piece of metal, so that’s where the sheet metal gauge comes in.
All you have to do is slide the openings over your work piece, and the gauge will give you a reading.
It’s pretty handy when you get to the point where you have lots of metal laying around, and you forgot what thickness it is.
I wouldn’t say this is an absolute must have welding tool for beginners, but it’s handy to have around the shop.
6. Metal File
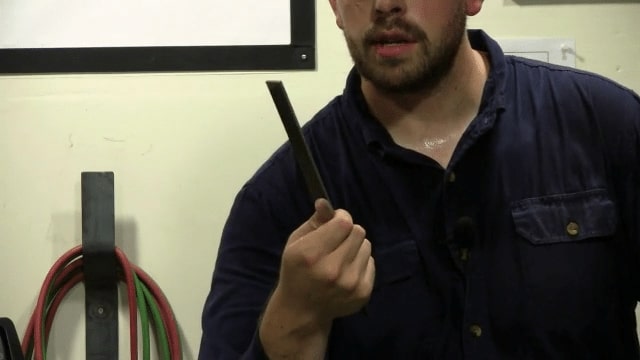
You’ve probably used metal files before, if not on a welding project, then on your finger nails.
They’re great to use when finishing a project.
When you start cutting your projects (I’ll get to that in a second) you’ll have lots of metal burrs that you want to get rid of.
You could do this metal cleaning with your grinder for bigger stuff, but the files obviously work great on the fine detail stuff.
A great investment, and they’re cheap.
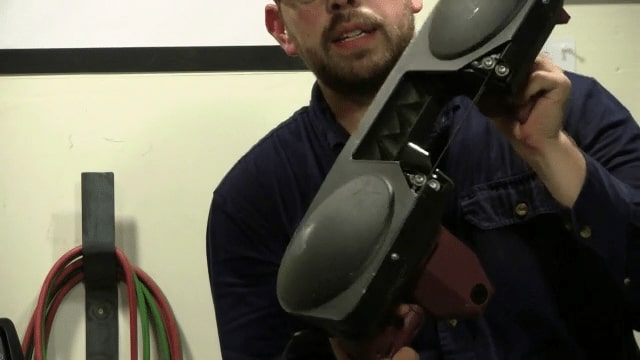
7. Welding Clamps
This next basic welding tool is an absolute must-have.
In fact, you need to get at least 10 welding clamps. You will need them. Imagine that you start a welding project, and you have to fit up the pieces tightly before tack welding them in place.
Without these clamps holding your workpieces tightly together, the metal warpage from welding will throw your project out of square.
I’ve used as many as 10 clamps at one time on a single project.
Here’s the order you want to follow.
- Cut your pieces to length
- Fit your pieces tightly together
- Clamp them in place
- Tack weld
- Remove clamps
- Lay final welds
8. Welding Gloves
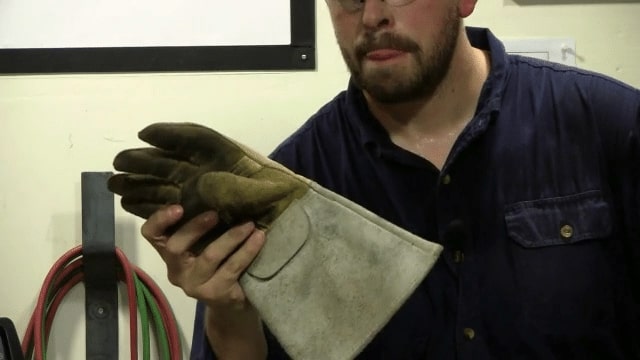
Obviously, you have to have welding gloves, unless of course you already have nerve damage on your fingers. In that case you won’t need them.
There are really thick welding gloves (which I recommend for beginners) that you can pick up hot pieces of metal with for a few seconds without getting burned.
Then there are the thin leather gloves. These are great for TIG welding where you need a more precise hold on the torch.
I would recommend that you start with a thick pair like in the picture.
They will last you for a long time unless you pick up lots of hot metal with them. It’s important to note that the temperature at the arc is around 10,000 degrees, so you will definitely feel some heat coming off your welds.
9. Metal Brush
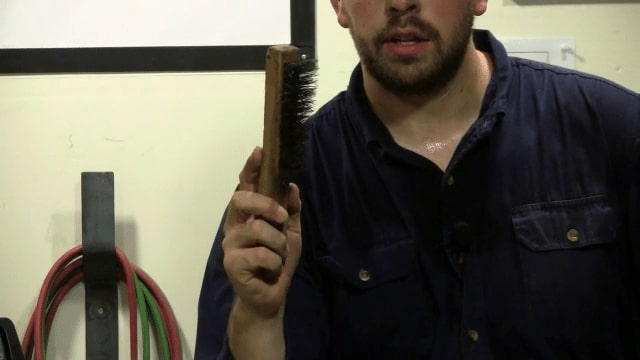
A metal brush is something you’ll need if you’re using a welding process that creates slag.
For example, if you’re welding with a stick welder or flux core arc welder you’ll have to scrape off the slag coating to reveal the final weld.
Chipping hammers and metal brushes are great for this.
This slag coating is created during the welding process because it acts as a shielding agent. The weld puddle has to be protected from the atmospheric contamination.
When using shielding gas, your welds will remain clean.
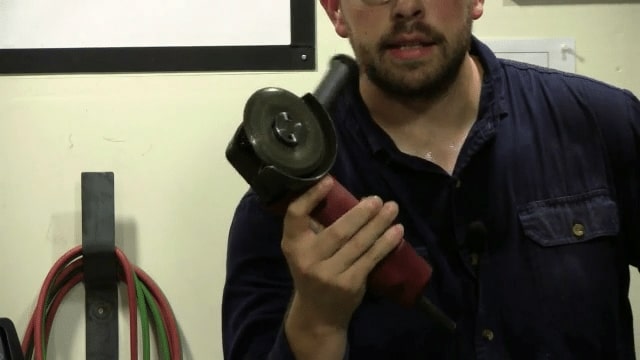
10. MIG Pliers
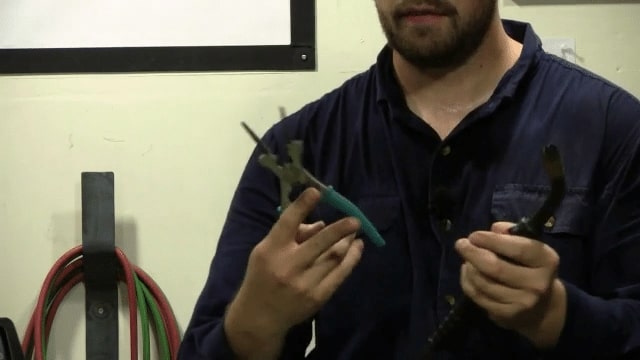
For those of you who are readers of my blog, you know that I recommend MIG welding as the easiest process for beginners to learn.
So, if you’re going to learn how to weld with a MIG welder, you’re going to need MIG pliers.
They are simple to use, and have several functions.
Function #1: Remove the hot nozzle
MIG pliers come equipped with a circular clamp so you can remove the nozzle from your gun. Remember, it’s very hot so this feature makes it very easy to not get burned.
Function #2: Remove the contact tip
The contact tip is where the wire comes out of your gun. They are made to match the sizes of your wire.
So, if you have .030 wire then you need a .030 contact tip.
The MIG pliers have a built-in circular clamp to unscrew the tip. You’ll need to occasionally remove your contact tip and replace it with a new one.
Function #3: Clip your wire
Typically, you want your wire stick out to be around 1/4″ before starting your weld. Any longer than that and you won’t get good penetration on your start.
The MIG pliers come with an easy cut-off so you maintain the correct wire stick out every time.
There is also one more feature that comes on the MIG welding pliers. You can see the long need noses on the pliers, right? Well, if you need to clean the weld spatter off the inside of your MIG nozzle, you just scrape it out with those.
It’s very easy to do, and you will need to keep your nozzle clean so the gas can flow out.
11. Soapstone
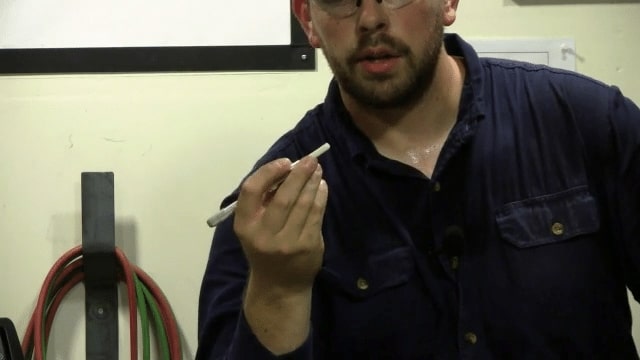
Soapstone is used as a marking tool when working with metal.
It’s great because it withstands the high heat of welding and cutting torches.
There are also markers available that will do the same thing. It’s basically like chalk that you write on the metal with.
If you have shapes you’d like to cut out with a torch, you would just draw your shape on the metal, and then cut away.
12. Angle Grinder
Angle grinders are a necessity. Period.
I don’t think you can get by without having one. You can put a grinding disk on to smooth out your projects, put a cut off wheel on to cut metal, put a wire brush on to remove paint, or put a flap disk on for precise grinding.
I recommend always having at least 2 angle grinders. One for grinding and one for cutting.
13. Safety Glasses
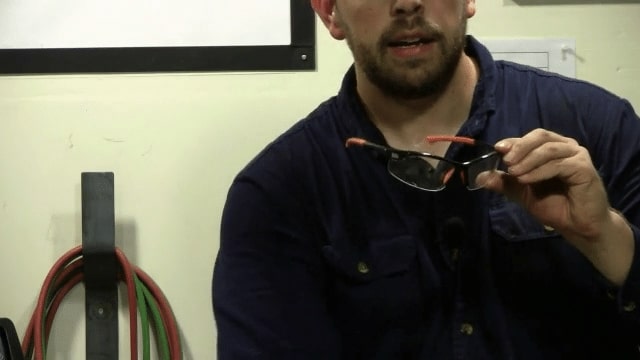
When you’re using angle grinders, you need to have some safety glasses on.
Those sparks you see flying off the grinding disk are small pieces of metal, and if one hits you in the eye, you’re done with.
Either get you some safety glasses, or a grinding face shield. Those are great to ensure nothing will hit your face when grinding or cutting.
14. C Clamps
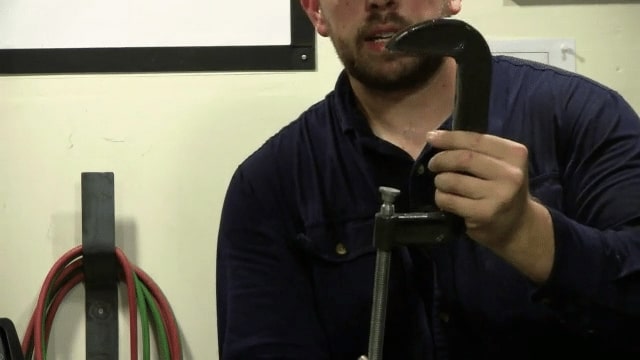
Having an assortment of C clamps will save you a lot of frustration. Being able to secure your workpiece down to a table is extremely important, and C clamps are perfect for that.
Imagine this…
You buy all the metal for your project, and take the time to carefully measure and cut. Then you start welding without clamping your project down. What happens?
The whole project will likely be ruined because it’s now badly warped. You should have clamped it down to a table.
You won’t regret have 5 or 10 C clamps of different sizes laying around your shop.
15. Portable Band Saw
A portable band saw isn’t necessary as a welding workshop tool for beginners, but it’s a fantastic piece of machinery.
Basically, it produces clean cuts that don’t need any rework.
If you have material you want to cut to length, having something portable like this is a great option. I use mine all the time.
Occasionally your blade will get dull, and you’ll have to replace it. However, that’s super easy to do.
16. Chipping Hammer
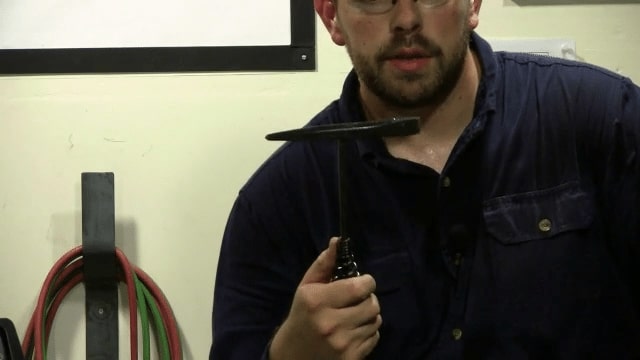
I mentioned earlier that if you’re MIG welding with flux core wire, or stick welding, you’ll have to chip away at the slag coating to reveal the weld underneath.
That’s what a chipping hammer is used for. To chip away the slag.
17. Oxy-Acetylene Setup
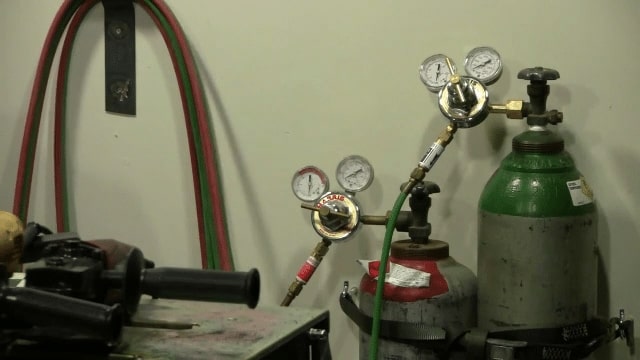
I save my most favorite metal working tool until the end. The oxy-acetylene setup is so versatile. You can weld with it, cut with it, bend with it, and more.
Need to cut perfect circles?
An oxy acetylene torch can easily do this.
Need to bend half inch steel plate to 90 degrees?
You can easily accomplish this with an oxy-acetylene setup. Just make sure you follow proper safety precautions because this is the most dangerous piece of equipment you’ll have in your shop.
If you’re new to welding, and you want to learn the easiest process for beginners, I recommend a MIG welder.

I would like to add one more item of necessary equipment & that is proper footwear – steel toed boots.
Love the information presented, I like your advice for beginners. I will look for more of your blogs. Thanks
Thank You Brother
First class was today. Thanks for the advice!