Looking to learn how to MIG Weld cast iron successfully? This guide is for you.
Cast iron has unique properties that make welding it different from welding other metals.
For beginners, learning to weld cast iron can be challenging.
But with the steps I’ve outlined below, you’ll be able to get started with welding pieces of cast iron with a MIG welder. Just keep in mind that even pros will struggle with this material, so it’s important to practice patience.
What is Cast Iron?
Cast iron is a ferrous metal with very high carbon content and silicon. In fact, most cast iron contains 2 to 4% carbon compared to steel which usually has about .4% carbon.
Cast iron also has fewer metals added to it, which helps provides rigidity and strength. Lastly, this metal has a fairly low melting point of around 2,200 degrees Fahrenheit.
Steel has largely replaced cast iron, because of its flexibility and tends to be easier to work with. However, both materials are made up primarily of iron.
So it’s easy to think that the two metals will be similar to weld. But, this isn’t the case, as there are a number of factors that separate the two metals.
Different Cast Iron Alloys
Just like steel or aluminum, cast iron comes in a number of different alloys. This means that the base metal, which is iron, remains constant but other materials, such as sulfur and carbon contents, will vary.
For instance, the carbon content in cast iron can range from 1.7% to 4.5%.
There are four main classifications of cast iron alloys:
- White – which is the hardest to weld, near impossible, because of its brittleness.
- Malleable – which is softer and easier to work with.
- Gray – which is similar to malleable but isn’t as tough.
- Ductile – whose makeup loosely resembles steel but is still susceptible to cracking.
| Cast Iron Type | Tensile Strength (Mpa) | Compressive Strength (Mpa) | Hardness (HB) | Elongation (%) | Toughness (j) |
|---|---|---|---|---|---|
| White | 200 – 410 | N/A | 321 – 500 | Very low | Very low |
| Malleable | 276 – 724 | 1350 – 3600 (pearlitic & martensitic) | 110 – 156 (ferritic) 149 – 321 (pearlitic & martensitic) | 1 – 10 | 4 – 12 j @ 20 °C |
| Grey | 152 – 431 | 572 – 1293 | 156 – 302 | < 0.6 | Very low |
| Ductile | 345 – 827 | 359 – 920 | 143 – 302 | 2 – 20 | 16 – 27 @ 20°C |
One of the problems that come up when welding cast iron is that you likely won’t know what alloy it is unless it’s purchased new. Fortunately, the weld settings and consumables are the same for all types of cast iron.
However, the quality of the weld, as well as its susceptibility to cracking, will vary. This is because of slight differences in the molecular composition of the metal.
Each has an optimal filler material and weld setting that you cannot take into consideration without knowing the exact metal type.
Why is Cast Iron Hard To MIG Weld?
MIG Welding cast iron is hard because of the metal’s high carbon content. In comparison to other metals, cast iron has high carbon and silicon levels. These two compounds are critical in providing a clean casting, but they are also detrimental from a weldability perspective.
The high carbon content means that the metal is extremely brittle and susceptible to cracking. In fact, the reason you’re probably trying to weld cast iron is likely because a crack developed, and it needs repair.
Another complicating factor is that you need to weld cast iron at a low temperature to prevent overheating and further cracking. When welding metals like steel, if the material heats up, it won’t matter. The worst thing that’ll happen in that situation is that you might blow through the metal.
But with cast iron, you may not realize it’s getting too hot before it’s too late, causing it to expand. By the time you turn off the heat, the metal will quickly cool and contract.
As it cools, the carbon will move to hotter areas, causing the crystalline structure of the metal to change and its strength to diminish.
While you can quickly run a bead down a piece of cast iron, you may come back a couple of hours later to find a crack has formed. This is why you need to take the proper steps while you weld but also in pre and post-preparation of the material.
How to MIG Weld Cast Iron
Before you rush to get your MIG welder out and fire it up, you need to go through all the steps to prepare. This includes picking out a good wire and settings for your welder.
Then once you are finished welding, it’s important to follow the remaining steps to ensure the weld doesn’t crack.
Choosing A Filler Wire
Using the proper filler wire for MIG welding is critical to getting a strong weld. The most important thing is using a wire that matches the material being joined together.
For regular steel, people commonly use ER70S-6. However, cast iron requires a special nickel-based filler metal to get the best results.
To be more specific, you can use ENiFe-Cl sold by Blue Demon as ERNi55. Blue Demon is a popular manufacturer of welding consumables, but they primarily sell products for specialty welding.
Selecting The Right Shielding Gas
Now is also a good time to discuss the shielding gas you’ll need for MIG welding cast iron. If you don’t intend on welding much cast iron, then you won’t need a big bottle.
The best shielding gas for cast iron will be 75% Argon and 25% Carbon Dioxide. However, you can deviate from this slightly by going up to 80% argon and 20% carbon dioxide.
Read more: MIG Welding Gas 101: What To Use
Welder Settings
Because you need to keep the temperature low for welding cast iron, you should use a short-circuit method of welding. If you’re unfamiliar with this, don’t worry, it simply means that the wire quickly touches the metal, shorts, melts, and then repeats the process.
This method is effective because it doesn’t produce a continuous stream of heat which could therefore overheat the cast iron.
To achieve this, you should use a thin wire such as .030 or smaller. You’ll also want to keep both the amperage and wire speed down as low as possible on the welder.
Unfortunately, there isn’t a simple chart to MIG weld cast iron. This is because there are different alloys and filler materials that you can use.
A good place to start is by checking your welder’s recommended settings for steel and going down slightly. You want the speed and temperature to be as low as possible while still getting good penetration.
Identify the Cast Iron Alloy
As I mentioned before, there are four main types of cast iron alloys that you should be familiar with. White cast iron is the most brittle and is nearly impossible to weld, so we won’t cover that in detail here.
What you will find in most applications is gray cast iron, which is also very difficult to weld.
The other two cast iron types are malleable and ductile, which are relatively easy to weld as long as proper care is taken to slowly cool them back down.
Unfortunately, there isn’t a great way to identify the alloys in the field or in a shop unless you have a microscope and can study their structure.
Surface Preparation
Like with all MIG welding, it is critical that you clean the surface adequately. New metal won’t be much of a problem, but if you’re working with older materials, you will need to remove any traces of rust or paint.
Regardless, it is a good idea to go over the area quickly with either a wire wheel or grinding/flap disc to make sure that it’s as clean as possible.
But one special consideration for cast iron is that the surface must be completely free of any oils or other liquids. Even trace amounts of oil can cause porosity in the weld pool.
To remove any residue of oil on the cast iron, you can use brake parts cleaner or other fast-drying chemicals; just make sure that it doesn’t have any soap or chlorine in it.
Joint Design/Geometry

Because of the unique temperature changes, as well as the general thickness of most cast iron pieces, you may need to cut a groove into the metal. The easiest way to do this is by taking a grinding wheel to the joints and flaring them out.
Although not an exact science, most people tend to do a 60 to 90-degree Groove.
The geometry will obviously differ depending on the type of metal and angle you are working with. However, on a butt joint, there should be a noticeable V-line.
This will not only allow for better penetration between the two metals but also prevent you from needing as much heat to penetrate into them.
Preheat
The final step before you finally get to start welding is preheating the metal. It’s very important to preheat cast iron because of its susceptibility to cracking.
However, this is very different from preheating other metals, such as aluminum which dissipates heat. Instead, cast iron needs to heat up slowly.
When preheating, it is very important to evenly go over the entire surface area, even where you’re not welding. The most common way to do this is with a torch such as oxy-acetylene or even MAPP gas.
A better way to preheat your metal is to put it in the oven, but most people don’t want to put dirty metal in their kitchen. Either way, you should get the temperature up to 500 degrees.
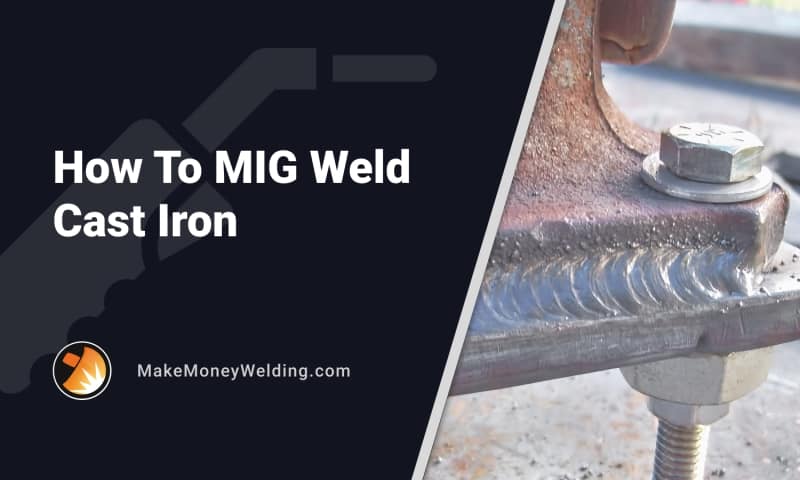
Weld Cast Iron
We’ve finally made it to the point where you can pick up the MIG gun and start welding. But before you get started, make sure that the ground has a good connection to the material you are working with.
Also, be sure to clamp the metal if you are working with two pieces. Once everything is set up, make a couple of tacks and double-check the alignment.
After getting a couple of tacks on, you can start running a bead, making adjustments to the welder’s settings as needed.
The best way to weld a bead is by starting from one tack and working your way through the others. However, if you are working with a thin piece of metal, you will need to “stitch” the joint or use a “wandering” method rather than running a long bead.
Thicker metals can also be tricky, especially if you ground a groove into it. In this scenario, you may need to make multiple passes to completely fill in the gap.
Just remember not to go too fast, as it could cause the metal to get too hot.
Finally, if a crack does start to form, you can try to stop it by drilling a hole on each side to prevent it from spreading further.
Peen the Bead

A unique step that needs to be taken for MIG welding cast iron is called peening the bead. The idea here is to tap the bead while it is still hot to help it stretch. This will help reduce the chance of cracking.
In other processes, such as arc welding, this wouldn’t necessarily be required because you chip away at the slag with a hammer.
Post-Heat
Once the material has been peened, you must take the appropriate steps to cool it properly. For steel and other metals, dunk the welded piece into a bucket of oil. However, you can’t do that with cast iron as it will crack.
Instead, you need to ensure that the material does not cool quickly and that it essentially stays hot for as long as possible.
In some cases, it can take multiple days to slowly cool a welded piece of cast iron. Unfortunately, that means you will not be using the piece for a while.
Some of the best methods to cool a piece of cast iron include putting the piece in sand. But if you have a little more time, the best way is to put the piece of metal over a fire and let it burn out.
FAQs
Can you MIG Weld cast iron?
Yes, by following the steps outlined above, it is possible to weld cast iron. However, welding cast iron is very difficult. Running a bead won’t be much harder than on a regular piece of steel, but there is a high likelihood that a crack will form.
Can I weld cast iron with a stick or TIG welders?
Yes, it is possible to weld cast iron with both stick and TIG methods, but your success rate will vary. Just like with MIG, it is very difficult to weld with stick and TIG on cast iron. Additionally, you will need to use special consumables.
Which welding process is best for cast iron?
Stick welding cast iron tends to have better outcomes thanks in part to the flux covering the welding rods. However, if you have a MIG welder, then it will suffice. Similarly, if you are more comfortable with MIG welding, then you may get better results.
Can I skip the preheating step?
I don’t recommend doing this because the metal must be evenly heated to ensure the best results. If you skip the pre-heating step, then you risk the cast iron cracking.
Wrapping It Up
As you can see, welding cast iron isn’t impossible, but it can be challenging. One of the biggest takeaways should be to exercise patience and not be in a rush when working with the material.
Even professionals struggle to work with cast iron and can still experience cracking.
When you first get started, try a couple of practice pieces with slight technique variations. For instance, you may try pre-heating and post-heating, some more than others. From there, you will get a better idea of what works and what doesn’t.
